Well, if you have a rooted smartphone, it’s easy. But if you haven’t
rooted your device, there are still some simple ways to get your phone
or tablet’s screen to show on your PC or Mac.
Why mirror your screen? There are plenty of reasons. You might be a developer
in the middle of coding and want to check your app without having to
constantly reach for your phone. You might want to share your pictures
on a big screen without uploading them. Or you might need to give a
presentation quickly while the projector is connected to a PC.
The quickest and easiest way, as you will find out, requires no installation on your phone, and just a Chrome browser app. Yup, you can’t get rid of Chrome that easily.
What You Need
Vysor, made by prolific Android developer Koushik Dutta, is the simplest way to get your Android screen onto your PC or Mac’s screen. Here’s what you need to get started:
Download Google Chrome and the Vysor Chrome app. Since Chrome works on Windows, Mac, and Linux, this app will work on all platforms, including Chrome OS, which you should give a chance.
An Android smartphone or tablet with USB debugging enabled.
Enable USB Debugging Mode on Android
We have a full explanation of what USB debugging mode is, but you don’t need to concern yourself with that here. All you need to know is how to enable it.
Go to Settings > About Phone
Scroll down and tap Build Number seven times
Go back to Settings > Developer Options (a new option you will see now)
Scroll down and Enable USB Debugging Mode
Confirm the action when prompted
Share Your Screen to Your PC or Mac via USB
Now that you have USB debugging mode activated, the rest is simple.
Start Vysor from the Chrome App Launcher
Click Find Devices and select your phone
Vysor will start up, and you will see your Android screen on your computer
Optional: You can set your phone to connect automatically every time the USB cable is plugged into it
With this, you are ready to go. Your mouse and keyboard work within
the app, so you can start any app you want and type in it too. There are
plenty of apps that don’t have a web client, so this is a good way of
using your physical keyboard for your phone’s apps.
Vysor’s Appeal Lies in Four Aspects
You don’t need anything installed on your Android phone.
It works on Windows, Linux, or Mac.
The USB cable makes your screen reflect in almost real-time, as
opposed to wireless solutions where there is distinct lag. Vysor still
has a slight lag, but it’s much faster than working off wireless.
You can interact with your phone’s screen through your computer.
How to Share Your Screen Wirelessly
One of the new features of Android 5.0 Lollipop
is that Google has made it easier to mirror the screen of any device on
this operating system. For a wireless, cross-platform solution, Koushik
Dutta has another app.
Make sure your computer and smartphone are on the same WiFi network.
Start AllCast Receiver through the Chrome App Launcher.
Start Mirror on your Android phone.
In Mirror, choose the Network Device that matches your PC. It will still start with “Chrome @” followed by an IP address.
Just like that, your screen will be wirelessly mirrored on your
computer. This is the easiest way to share your Android screen
wirelessly, and it supports other devices on the same network too,
including Fire TV, Apple TV, Roku, and more.
Mirror has a few disadvantages:
You cannot interact with your screen through your PC. The
interaction is limited to your phone itself, but you will see what’s
happening on the big screen. Unfortunately, that means no typing with
your computer’s keyboard on your phone.
Unfortunately, that annoying “Mirror” floating watermark is going to
stay, and there is no way to remove it. This can be a dampener for
presentations and slideshows.
If you are ready to root your device, then there is a much better option than Mirror. Instead, you can install the awesome Airdroid 3 suite on your Windows or Mac computer and choose the AirMirroring feature.
This mirrors your screen on your computer and lets you interact with
it too, using your mouse and keyboard. It works seamlessly and is, in my
opinion, the best solution here. In fact, I’d say it’s reason enough to
root your Android.
What Do You Use Screen Mirroring For?
Now that we’ve listed the several ways you can mirror your smartphone
screen to your computer, there’s just one thing left to answer:
What do you use screen mirroring for? I’m genuinely curious, so drop a line in the comments!
How can you perform memory sd card recovery
if you imprudently formatted it? This unhappy thing always happens when
you go out with your family and take some precious photos with digital
camera. But you forget transferring those photos to the computer, some
other members of your family carelessly deleted the photos or formatted
your memory card and there is no backup. If so, there is no time for you
to regret. Hurry up and you still have chances to recover the photos or
your important files from deleted or formatted memory card. The case is
that how can you handle this memory card format recovery trouble?
Overview of memory card
A memory card or flash memory card is a solid-state electronic
flash memory data storage device used in digital cameras, handheld and
mobile computers, cell phones, music players, video game consoles, and
other electronics. It has high re-record-ability, power-free storage,
small form factor, and rugged environmental specifications. Files like
photos stored in memory card might have been lost due to disoperation or
unintentional actions. The following will show you how to use memory card recovery software to easily get lost data back in memory cards.This tutorial can be also used to recover deleted files from external hard drive, USB flash drive, and some other storage devices.
Download free memory card software to unformat, undelete files from sd/sdhc/sdxc card
Free memory card recovery software from EaseUS can do memory card format recovery with free and easy recovery software - EaseUS Data Recovery Wizard Free Edition
for you. All types of memory cards from Samsung, Integral, Sandisk,
Kingston, PNY, Panasonic, Lexar, Verbatim, Sony, Fujifilm, etc can be
recovered under Windows environment with this powerful free and easy recovery software. Step 1. Launch EaseUS Data Recovery Wizard and select the file types you want to recover. Then click "Next" button to move to the next step.
Step 2. Select the memory card where you lost your data and click "Scan" button, the software will quickly scan the selected disk to find all your target files.
Step 3. After scan, you can preview all the listed recoverable files one by one and select out those you want. Then, click "Recover" button to get them back once. Here you should save all the recovered files on another disk to avoid data overwriting.
Video Tutorial to Recover Data from Formatted Memory Card
This is a detailed video tutorial that shows how to recover data from formatted memory card with EaseUS Data Recovery Wizard.
As we know, clicking pictures and making
GIF from them is much better than live screen recording, as it consumes
less memory. Therefore, we are going to share an easy method that will
help you capture screenshot in the form of GIF. Go through the post to
know about it.
There are lots of tools available
today on google play store for screen recording and screen capturing
that records the live screen display but all these apps generate bulk
sized files of screen recordings. And this can pay a load on your
android storage, so here we have the alternative for it that is merging
images in the form of animated GIF and with that you can see the live
effects of the things performing on your android. And this can be done
very easily with the app that we will be discussing here. So follow up
the complete guide discussed below to proceed.
This method depends on a cool android
app by which you can combine up two screenshots and that will be making
animated GIF screenshot and will be of the very lesser size that the
other apps create. So follow up the steps below to proceed.
Step 1. First of all download and install the cool android app GIF Makeron your Android device.
Create Animated GIFs From Images in Android
Step 2. Now if you want to create GIF from your
existing photo’s or screenshot then select the option “Make GIF” it will
open up your Album
Create Animated GIFs From Images in Android
Step 3. Now select your desired album and choose the photos, in the screenshot below I have selected four photos.
Create Animated GIFs From Images in Android
Step 4. Now you have to click on the icon located in a top right corner of your screen.
Create Animated GIFs From Images in Android
Step 5. Now you can see your created GIF, You need to click on “Edit GIF” option and can remove pictures from your GIF and can set time in “Frame per second” and click on “OK” and then “SAVE”
Create Animated GIFs From Images in Android
That’s it! you are done, your GIF screenshot is ready in your gallery
that is having multiple screen effects in one and there will be no huge
video that can loads you memory, just a GIF images that will be of just
memory In KBs.
Create Animated GIFs From Images in Android
So above is all about How To Capture Animated GIF Screenshots In Android.
With this method, you can easily make you desired animated GIF in your
android by just merging up the different photos in one. And you can
solve someone technical problems of android with this GIF animation with
step by step display. Hope you like this cool method, keep on sharing
with others. Leave a comment below if you have any related queries with
this.
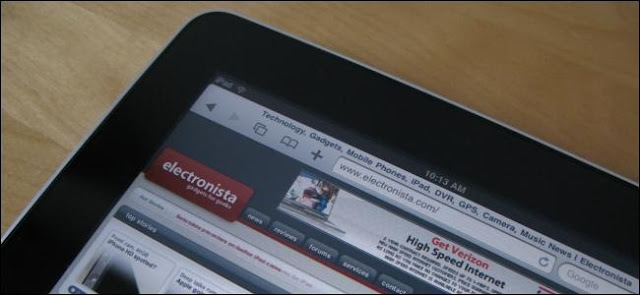
Many websites offer specific interfaces for smartphones, iPads, and
other mobile devices. Whether you need to test mobile websites or you’re
just curious to see what they look like, you can access them in your
desktop browser.
You can do this by changing your browser’s user agent — we’ve previously explained what a browser user agent is.
Accessing a website with an iPad user agent may also force it to serve
you HTML5 video, which is nice if you’re trying to avoid Flash.
User Agent Switcher Extensions
We have covered how to change your browser’s user agent without installing any other software.
However, for ease-of-use, you will probably want to install a browser
extension that lets you quickly and easily change your browser’s user
agent.
You will want to install either User-Agent Switcher for Chrome or User Agent Switcher for Firefox, depending on which browser you use. For Internet Explorer, you may want to try the UAPick User-Agent Switcher add-on.
Setting a Mobile User Agent
To change your user agent, locate the User Agent Switcher extension
icon on your browser’s toolbar, click it, and select a mobile user agent
in the list.
(You may need to add the User Agent Switcher icon to Firefox’s
toolbar after installing it. To do so, right-click the toolbar, select
Customize, and drag and drop the User Agent Switcher icon onto Firefox’s
toolbar.)
Refresh the page you are currently on (click the Refresh icon on the
toolbar or just press F5) and you will see its mobile version. You can
access other websites and you will see their mobile versions for as long
as your user agent is set to a mobile user agent.
When you’re done, select the Default User Agent option.
The process is similar in other extensions. Even if you are using
your browser’s built-in user agent switcher, it should be a fairly
simple process.
Additional User Agents
Some user agent switchers don’t come with a comprehensive list of
user agents. For example, the User Agent Switcher extension for Firefox
doesn’t include an option that allows you to set your user agent to an
iPad’s.
You can download additional user agents by clicking the User Agent Switcher icon and selecting Edit User Agents. Click the Download lists of user agents to import link and you will be able to download and import a more comprehensive list of user agents.
Now Control your Window 10 PC from android mobile without downloading any additional software in PC. You just need to enable Remote Settings in Window 10 PC for controlling your PC from the android mobile.
How to Control your Window 10 from your Android Mobile
Here we use Official Microsoft Remote Desktop app in android for control your Window 10 PC from android phone. This app is totally free and you can download this app from Google Play Store.
How to Control your Window 10 from your Android Mobile
How to Enable Remote Settings in Window 10 PC
1. Open File Explorer in Window 10 from Pressing Window + E Keyboard button.
2. Click on System Properties in Window Explorer.
Open System Properties in Window 10
3. In the System Properties Select Remote Settings.
Remote Setting in System Properties
4. Now Select Allow Remote Connections to this Computer and Click on Ok.
Enable Remote Desktop Computer in Window 10
Know your IP Address in Window 10
For Controlling your PC from the android mobile, you must know your IP Address. Know your IP Address from typing ipconfigcommand in CMD.
Command Prompt IP Address
Know your Window 10 PC Username
Make sure you know your PC username for controlling your PC from the
android mobile.You see your Window 10 Username from pressing Window
Button.
Username in Window 10
How to Setup Microsoft RDP App in Android Mobile
1. Download Microsoft RDP App from Google Play Store.
2. Launch this app in your Phone and tap on the + icon.
Microsoft Android App
3. Select Desktop and enter Remote PC IP Address. Tap on Save button.
Remote IP Address in Microsoft Android App
4. Now enter Computer Username and Password in Logon box. Now tap on Connect and you successfully connect with remote computer.
Window 10 Remote Login in Microsoft Android App
This is the easiest method for controlling your Window 10 PC from an
android mobile. In this method, you don’t need to download any
additional software in your PC.